Guest post by Aleks Salkin
“Chiseled abs in 3 weeks!”
“Five new moves to build your six pack!”
“Flatten your tummy in 4 easy steps!”
Pick up any men’s or women’s magazine and you’ll all find similar promises tugging at your inner desire to look head-turningly hot and sometimes tugging at your purse strings to buy some new ab-sculpting gadget. The prospect of an eye-popping midsection really does catch everyone’s eyes and captivates their imagination.
Well, I don’t blame you for wanting to look like a Greek statue made flesh, but I cringe every time I see people attempt it with either of the following:
1) high-rep, spine-wrecking exercises like crunches
2) late-night gadgets that overpromise and underdeliver.
Stop that. Much to the chagrin of countless ad execs and marketers, pretty much everything you need for a set of Epic Abs is at your disposal – it’s the principles and practices that you need, not the gadgets that you’ve been sold along with a free Bill of Goods to go with it.
In addition to looking legendary, your abs serve a variety of more mundane but equally important purposes, such as stabilizing your body and protecting your internal organs (among other things). You can –and SHOULD – train your vain interests and your practical ones at the same time, not only to save time but to get the best bang for your figurative buck. This is the center of the Epic Abs system that Pat and I have come up with. The following program is just one example of the more advanced end of that system, but is still approachable by intermediate trainees via using one of the key practices of the system: manipulating leverage.
This program contains only two moves, but they’re the two that will carry you the farthest in your ambitions and with the barest minimum amount of equipment possible (what else could you expect from two minimalists?). You’re gonna cut your teeth – and cut up your midsection – with the hanging leg raise and the clutch flag.
The hanging leg raise will train your legs and hips to work in tandem with your midsection and will tie your midsection to your grip while also building active flexibility – an oft-untrained but very important component for building resilience and athleticism throughout the body – as well as strengthening one of the jobs of your abs: movement, specifically flexing forward.
The clutch flag will reeducate a regularly – but poorly – trained element of midsection training: static strength, i.e. isometric tension. Usually trained with planks and other “functional” movements, it’s easy to think you’re getting in a good workout without actually going anywhere. The best way to test your static strength is by putting it up against the ultimate challenge: Gravity. The clutch flag will do just that, requiring you to stay still as a statue while your gut goes to work building and strengthening all the muscles of your waist.
Get it? Great! Let’s get started. Pat and I could easily go on and on about the intricacies and fine points of these two moves, so I’ll try to prevent myself from geeking out by giving you only the need-to-know steps and letting you take it from there.
First, the hanging leg raise.
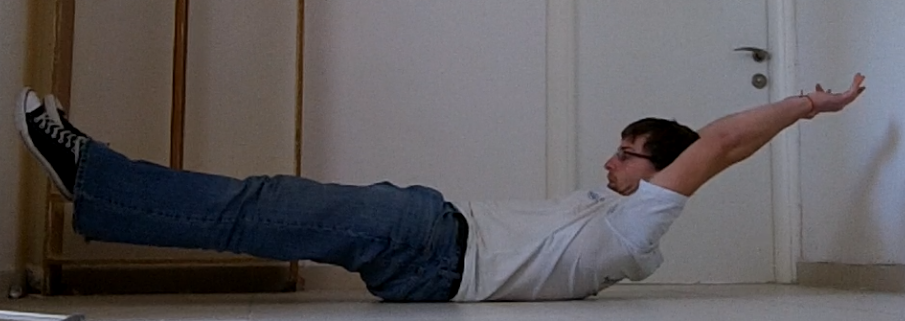
First and foremost, you need to be hollow. I’m not talking materialistic hollow, but physically hollow. Forget what you’ve heard about sucking your stomach in toward your spine; you’ll be doing the opposite. Practice by doing the following:
– Lay on the floor and push your low back through it like you’re squishing a bug beneath it.
– Lift your legs in the air just high enough that it feels like they’re resting on your butt
– Lift your head and look down toward your feet so that your upper back raises slightly off the floor
– Put your hands over your head and suck your shoulders into your sockets.
It should look a little something like this:
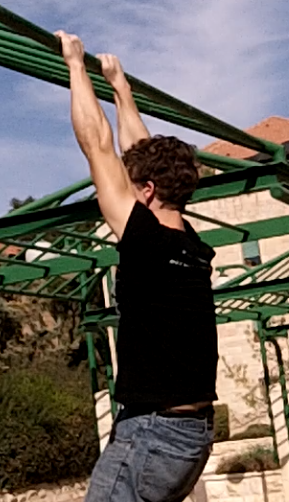
Next step: get good at this, and then hang from a bar exactly the same way (though you can look straight forward once you’re on the bar, be sure you still tuck your chin).
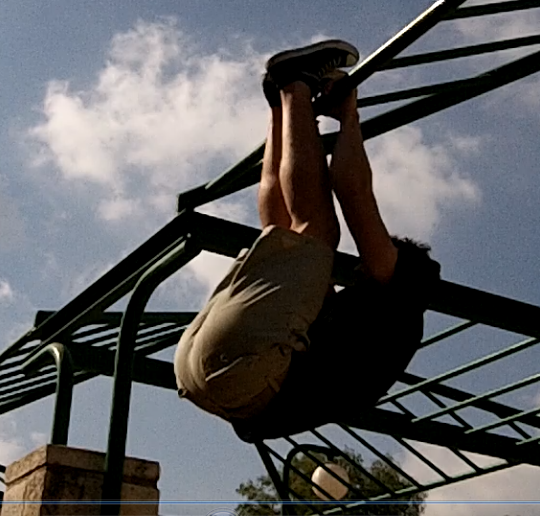
The hollow hang. Note that it’s anything but an impression of a helplessly dangling sausage. If it’s not tight, it’s not right.
If you’re already strong, the main thing you’ll probably need to work on will be your hamstring and low back flexibility, which can be accomplished by a variety of exercises beyond the scope of this humble article. For now, suffice it to say that you can simply start to progress by raising your legs as high as you can and then returning them to the dead-hang position. (A pro-tip: Imagine that you’re trying to touch your hips to your nose.)
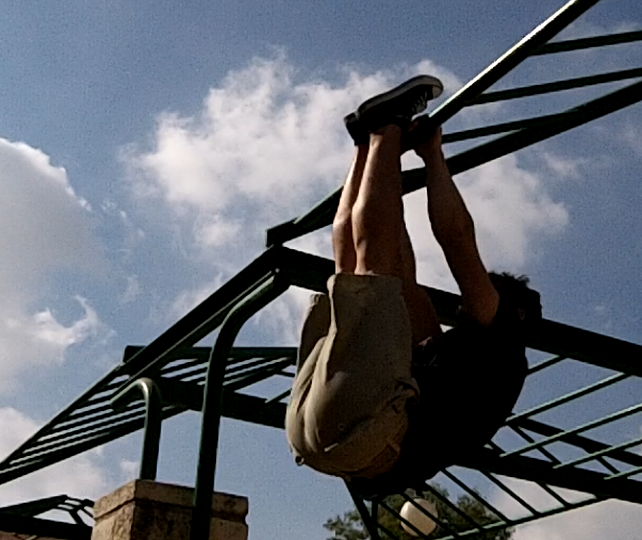
Now, the goal of the hanging leg raise is to get your feet or ankles to the bar, but it’s not the requirement. Start by raising them as high as your flexibility and strength will allow, but don’t make the mistake of bending your knees or swinging your legs to get them there. Both options are weak and will only create the illusion of strength – plus, they won’t prepare you for the real deal.
A legit HLR – knees and elbows straight as an arrow.
Close, but no cigar. Keep those elbows and knees in line!
Next, the clutch flag.
Because pictures don’t really do it justice, I’m including this short video to give you some insider tips on how to knock it out of the ball park early and often. It’s tough, and will challenge the sides of your body in a way that few other exercises really can.
So, how do you program it into something that will give you the most and demand the least, both in terms of time and reps?
Simple: a short circuit to squeeze your waist from coal to diamond.
Step 1: Find the amount of near-perfect reps you can do in the leg raise and the amount of time you can hold the clutch flag on your less-strong side. Master SFG Fabio Zonin likes to refer to this as your technical rep max, and I can’t think of a better way to approach your training.
Let’s say you got 4 solid hanging leg raises and a 10 second clutch flag. You stud/studette, you. Here’s your reward:
Hard day
A1) 2 strict hanging leg raises
A2) a 5 second clutch flag on each side.
Repeat for as many quality rounds as you can in 15 minutes
Easy day
A1) 1 strict hanging leg raise
A2) 5 second clutch flag left
A3) 1 strict hanging leg raise
A4) 5 second clutch flag right
Repeat for as many quality rounds as you can in 15 minutes
For both days, rest as little as possible but as much as necessary. Work on keeping your technique as tight as possible.
Your hard day will have you hanging and holding twice as long, and your easy day will have you moving between hanging and holding more often to reduce the fatigue even further and act as a mechanism to help you improve your technique by helping you stay fresh longer.
Leave at least a day or two between your easy and hard days, and carry on for at least 8 weeks.
To progress, simply add a rep in the HLR and a second or two in the clutch flag as you feel stronger and less challenged with your original rep/second scheme. Almost seems too good to be true, but it will work very well. Hell, it already does, it just needs YOU to start doing it.
Gentleman or lady, these two exercises – or whatever variation you can manage – will take you from chump to champ in less time and with less pain than the glossy magazine covers and late-night doodads would have you believe. In exchange, you’ll have to put your sweat and hard work into improved technique and higher tension, but the payout will be a midsection that looks like it was carved by Michaelangelo and will feel just the same.
Give it a shot, let me and Pat know what you think in the comments section below, and enjoy your epic abs.
Announcing: The Epic Abs Workout–A 7 Hour Ab Training Intensive
On August 24th, Aleks and I (Pat) will be hosting ourEpic Abs workshop at the Dragon Gym. We’d like to invite you to join us for this 7 hour intense on progression towards and learning to use the “vital few” ab exercises, for a leaner, harder midsection, so you can get more out of your ab training with fewer, but better movement selections and understand how to best program direct abdominal work for both strength and aesthetics.
For more information on what we will be covering and to reserve your spot CLICK HERE.
This is limited to 30 people, so please secure your spot ASAP.
Aleks Salkin is a StrongFirst-certified kettlebell instructor (SFG), StrongFirst-certified bodyweight Instructor (SFB), and an Original Strength Specialist. He grew up scrawny, unathletic, weak, and goofy, until he was exposed to kettlebells and the teachings and methodology of Pavel in his early 20s. He is currently based out of Jerusalem, Israel and spends his time spreading the word of StrongFirst and calisthenics, and regularly writes about strength and health both on his website and as a guest author on other websites. Find him online at http://www.alekssalkin.com.
Nice work. Congrats on being in the PTDC articles of the week.